
Managing images in your .NET MAUI application is a lot easier than with Xamarin.Forms. .NET MAUI removes the need to scale and resize your images for each platform and screen resolution. Better than that, it saves you having to remember that website that generates it all for you. Add your images to your project, ensure the build actions are configured, and boom! .NET MAUI will handle the process for you at build time.
If you’re interested in how .NET MAUI is resizing the images at build time, you can view the source of the tool (ResizetizerNT) over at GitHub. During the build process, ResizetizerNT processes the shared resources and resizes them to the appropriate resolution for each platform and screen size. It’s important to note that whilst .svg files are the recommended and preferred format, it will also handle .png and bitmaps.
App Icons
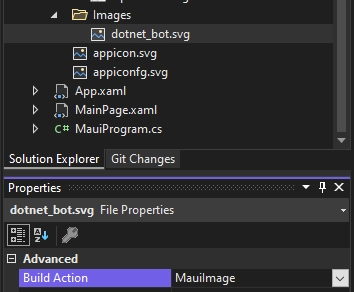
To add your app icon to your project, drag the image into the Resources\ folder within your project. Then by changing the Build Action of the image to MauiIcon in the Properties window, this will let .NET MAUI know to configure each platform to use this image as the icon, as well as resizing the icon at build time.
It’s worth being aware that the .svg file format is recommended for app icons with MAUI compared to .png files which are regularly used when developing a Xamarin.Forms application.
![]()
You can also configure this manually by adding the following to your project file
<MauiIcon Include="Resources\Images\appicon.svg">
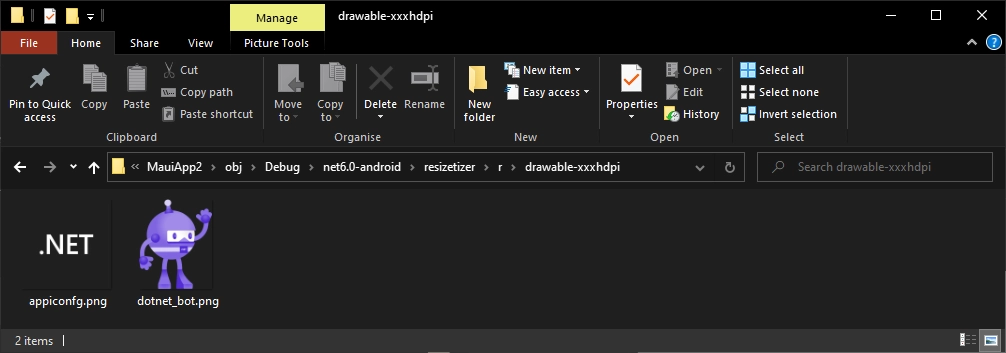
You can find all of the images created as a result of the resizer by running a build, navigating to the obj folder, and browsing into one of the builds (e.g. net6.0-android). For example with Android, go into the build output and select
App Images
You can also resize images that you want to show in the application in a similar way to how app icons are handled. Again, these images will be resized at build time.
By default, your project will be set up to automatically resize any images that are placed in the Resources\Images folder. If you wish to use a different folder structure for your project, you can edit this line in your .csproj file and change it to point to a location that suits you.
<MauiImage Include="Resources\Images\*">
You can also add specific images outside of this file by changing the Build Action to MauiImage or even add extra folder locations by adding the following to your .csproj file.
<MauiImage Include="YourFolder\ExtraImages\*">
.NET MAUI is still a preview release. Whilst this blog post is accurate for .NET MAUI Preview 12, this does not guarantee that it will be correct when .NET MAUI is officially released.
Comments