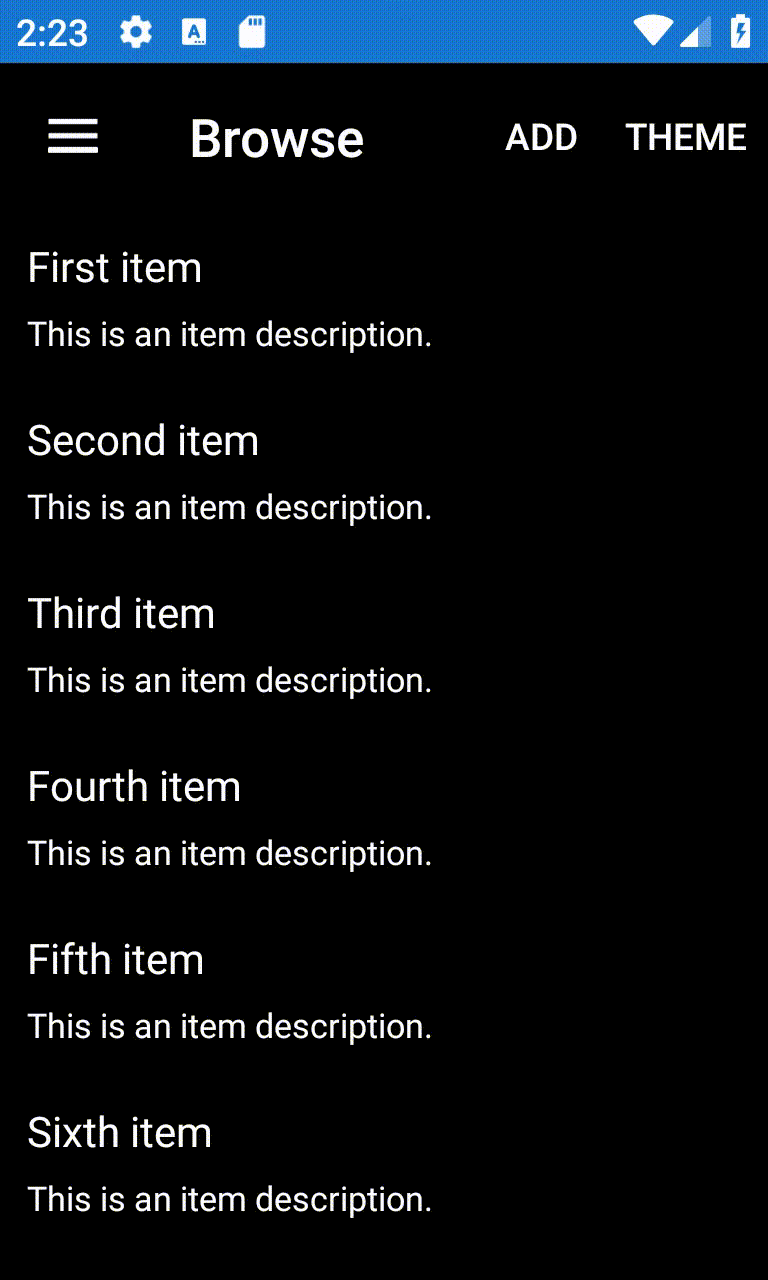
Supporting Dark Mode with Xamarin.Forms
Dark mode is a really popular colour scheme nowadays, phones have it built into their OS’s, mainstream apps support it, (Whatsapp, Twitter). But by default your Xamarin.Forms application will be using a light theme. Luckily for us, it’s fairly quick to add another theme to our application and allow users to toggle between them. 
Themes
The first thing that we need to move to (if you don’t already use them) is create themes. We’re going to need 2 themes, one for our light theme and one for the dark. To demonstrate this, I’ll create an empty Xamarin.Forms project (using the Visual Studio template). I’ll begin by adding two ResourceDictionary to our application.
For the light theme Styles\LightTheme.xaml
<ResourceDictionary xmlns="http://xamarin.com/schemas/2014/forms"
                    xmlns:x="http://schemas.microsoft.com/winfx/2009/xaml"
                    x:Class="XamarinFormsDarkTheme.Styles.LightTheme">
    <Color x:Key="NavigationPrimary">#2196F3</Color>
    <Color x:Key="BackgroundColor">#FFFFFF</Color>
    <Color x:Key="TextPrimaryColor">#B0000000</Color>
    <Color x:Key="TextSecondaryColor">#80000000</Color>
    <Color x:Key="TextTernaryColor">#C8C8C8</Color>
    <Style TargetType="NavigationPage">
        <Setter Property="BarBackgroundColor" Value="{StaticResource NavigationPrimary}" />
        <Setter Property="BarTextColor" Value="White" />
        <Setter Property="BackgroundColor" Value="{StaticResource BackgroundColor}" />
    </Style>
    <Style TargetType="Label">
        <Setter Property="TextColor" Value="#B0000000" />
    </Style>
</ResourceDictionary>
And finally, for the dark theme Styles\DarkTheme.xaml
<ResourceDictionary xmlns="http://xamarin.com/schemas/2014/forms"
                    xmlns:x="http://schemas.microsoft.com/winfx/2009/xaml"
                    x:Class="XamarinFormsDarkTheme.Styles.DarkTheme">
    <Color x:Key="NavigationPrimary">#000000</Color>
    <Color x:Key="BackgroundColor">#FF000000</Color>
    <Color x:Key="TextPrimaryColor">#C8C8C8</Color>
    <Color x:Key="TextSecondaryColor">#FFFFFF</Color>
    <Color x:Key="TextTernaryColor">#C8C8C8</Color>
    <Style TargetType="NavigationPage">
        <Setter Property="BarBackgroundColor" Value="{StaticResource NavigationPrimary}" />
        <Setter Property="BarTextColor" Value="White" />
        <Setter Property="BackgroundColor" Value="{StaticResource BackgroundColor}" />
    </Style>
    <Style TargetType="Label">
        <Setter Property="TextColor" Value="White" />
    </Style>
</ResourceDictionary>
Great, we now need to let Xamarin.Forms know where to load our styles from, as we’ve just removed all the existing styles. We’ll edit the App.xaml to include a reference to our preferred theme.
<Application.Resources>
    <ResourceDictionary Source="/Styles/DarkTheme.xaml" />
</Application.Resources>
Implementing Themes
Greate, we’ve got two themes built and we can use them throughout our app. Except, we’re not using them anywhere in the app! We now need to tell our app which of these resource dictionaries that we want to use. For future use, it also makes sense that we save a reference to which theme we’re using. It’ll make some of the logic for deciding which theme we should be using, easier.
I’ve done this in a really simple way, just by adding a property in app.xaml.cs
public static string AppTheme { get; set; }
Toggling the theme
Great, we’re now using our chosen theme. But how do we change which theme? Say, a user wants to use the light theme and you’ve set the app to use the dark theme by default. Again, this is something that is really easily handled, allowing users to have direct control over which theme they’re currently using. For the purposes of this demo, I’ve added a button, and the click event looks like this
private void MenuItem_OnClicked(object sender, EventArgs e)
{
    if (App.AppTheme == "dark")
    {
        App.AppTheme = "light";
        App.Current.Resources = new LightTheme();
    }
    else
    {
        App.AppTheme = "dark";
        App.Current.Resources = new DarkTheme();
    }

}
Finishing up
By now, you should have everything you need to use 2 different themes within our application and allow the user to swap between them themes.
As always, you can find the code for these examples here

Comments